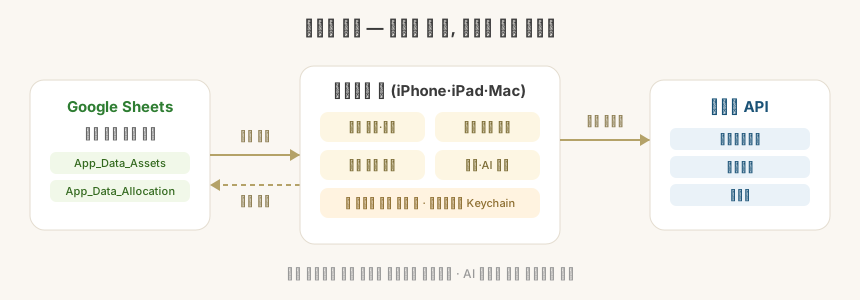
| How to start | Good if | What you need |
|---|---|---|
| Sample | You want to look around first | Nothing |
| Enter my assets | You want to keep your accounts in the app | Nothing |
Sample
Every screen works on example assets, with no sign-in and nothing to type. Home, Assets, the adjustment plan, the portfolio report, News and Build (my portfolios · community) all run.
The numbers here are not real. When you like what you see, switch in settings.
Enter my assets
You keep accounts and holdings inside the app. The data is stored on the device, and devices signed in to the same Apple account see it together over iCloud.
- Under Settings > My assets, change “start with” to Manual entry. (On Android this is the Manage tab > Data. Read “Settings” as “Manage” for the paths below.)
- Open Accounts on the same screen.
- Add an account — type a name, press Add, and it appears (for example: brokerage, pension).
- Tap an account to open its editing screen and add holdings there — name, symbol, quantity, average cost, class (stock · ETF · crypto…) and currency. Pick one from search and the symbol, class and currency fill themselves in.
- On the same screen, enter the cash balance and the target weights. Next to each target, the amount that weight comes to is shown.
You can rename an account later by swiping left in the account list — its holdings, cash and targets come with it. You can delete one from the same place, which removes its holdings, cash and targets for good.
The same ledger on every device
Available from 1.2.0.
Sign in to iCloud with the same Apple account and the ledger you entered syncs between devices. There is nothing to switch on.
On Android it starts when you turn on Manage > Device sharing. It matches through your own Google Drive and is off by default — leave it off and the data stays on this device only.
Editing on two devices at once loses nothing. It compares what each side changed against the last state the two devices agreed on, and merges. Changes to different accounts or holdings are both kept.
Only when the same holding was changed differently on both sides are you asked which to keep. The app cannot know which quantity is right.
Without an iCloud sign-in, everything stays on that device and appears nowhere else.
Prices attach themselves from the symbol. Value, return and weight are worked out by the app, so you do not enter them.
Leave the symbol empty and no price attaches; the maths runs on the average cost you entered. A holding whose price has not arrived shows its cost (quantity × average cost) rather than zero.
Import from a screenshot
Available from 1.2.0. On Android, from the first version.
Instead of typing holdings one at a time, paste a screenshot from your brokerage app and it reads the names, quantities and average costs for you. No broker API key, and it works with any broker.
- In your brokerage app, capture the screen that shows your holdings list.
- Under Settings > My assets > Accounts, tap an account and open Import from a screenshot.
- Press Paste and what it read appears as a list. On a Mac,
⌘ ⇧ 4saves to a file rather than the clipboard — then use Pick from files and choose that image. - Check the values and fix anything on the spot.
- Press Save and it lands in that account.
A few things worth knowing.
- It imports only what is on screen. Holdings scrolled out of view are not deleted, so with a long list you can paste in a few goes.
- Holdings that already exist are overwritten, not duplicated.
- Names come in cut off by the screen width (
TIGER US Dividend Dow…). After reading, the app searches to match them. When it narrows to one, it applies it; when several fit, it shows the candidates and you pick, which fills in the symbol, class and currency too. Rows matched automatically are marked as such, and Search again changes one that is wrong. - The name has to be right for prices to attach and for the next screenshot to recognise the same holding.
- Rows it is unsure about are marked needs a check, with the raw text it read beside them. Compare them before saving.
Text recognition happens on the device only. The screenshot is never sent anywhere and is not stored.
There are no broker connections in the public app
Reading balances by entering a broker API key was left out of the public app. Reading a balance is not the problem — but using it means getting an app key and secret from each broker yourself, and that is a wall.
Import from a screenshot (above) takes the typing off your hands instead — no key, and it works with any broker.
Google Sheets link (up to 1.0)
Gone from the public app since 1.2.0. The app could only read a sheet, so target weights, notes and balances could not be edited in the app — and that one read was the only reason a Google sign-in was needed. Sharing between devices is now iCloud's job (or your own Google Drive on Android).
If you were using a sheet, updating moves you to Manual entry. The sheet itself is yours and stays where it is, so you can read the values across — and import from a screenshot (above) can fill them from your brokerage screen in one go.
If you change how you start
You can change it in settings whenever you like.
Each mode keeps its own data, so switching to the sample and back to manual entry leaves what you entered exactly where it was.